How it was shot – “Haunted”
Hello everyone. I am very excited about writing my very first blog for broncolor.
And equally excited to share the experiment with lights and long exposure light painting that I conducted.
I had the idea of showing motion “on the inside” of my model, to show emotions. Idea partly inspired by my quest to bring awareness to what we all go through if we find ourselves in anxiety.
It’s been my consistent goal as a photographer and artist to spread awareness and share my points of view through my work, so this one is no exception.
At the same time I tried to stay true to my aesthetic- dreamy, borderline surreal imagery that speaks emotion, but reserved in expression.
So, here, presenting my recent project ”Haunted” and how it was made.
For this project i thought of using mix of pastels and bright colours to show diversity of intensity in how anxiety expresses itself- from minor pastels to all-out red and orange.
The set had to be dark and a bit gloomy, so I went for textured wall for one set, played on contrast of blue and red for another and finished it with a wider, less abstract set up.
I wanted to use variety of lights to see how I can work out the same idea and styling keeping different equipment in mind.
For the first set I used move L- 1 mobi LED with stripbox.

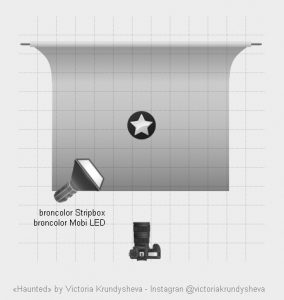
The outfit in itself had multiple light spots and pattern, so I limited it to one light source facing the model under around 60 degrees.
The technique I used works best in less lit spaces as it essentially draws with light and stands out in contrast.
For this particular type of long exposure light painting you move not the subject, but the camera.
I started by setting a long exposure on my camera. My shutter speed was on 0”8 with focal ratio varied from f6 to f9.
For it to work, studio needed to be completely dark with no other lights apart from the one on model.
After placing the model and setting the light, I started moving my camera during the exposure time.
If you are trying something like this for the first time I would recommend to move your camera in all possible directions to get a hang of how it works and to figure out what you like.
As for me- I knew the kind of effect I wanted.
One of the main rules for this long exposure shoot- you need to move your camera in exact opposite direction to where you wish the light trace to appear.
So if I want the light trace to be directed at top right corner, I move my camera to bottom left corner.
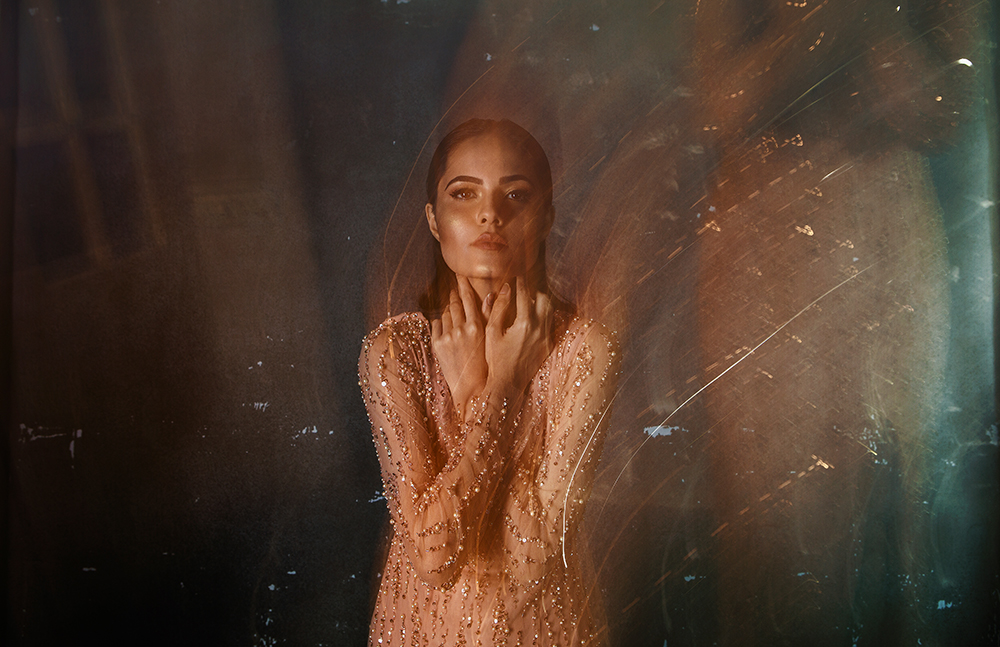
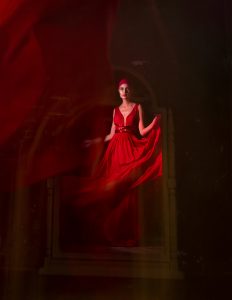
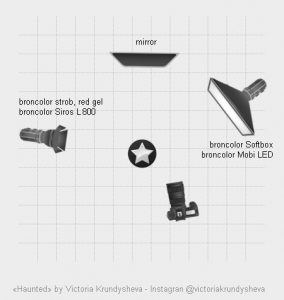
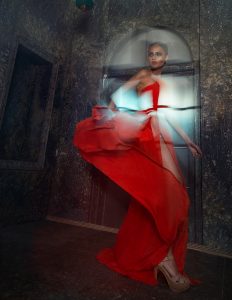
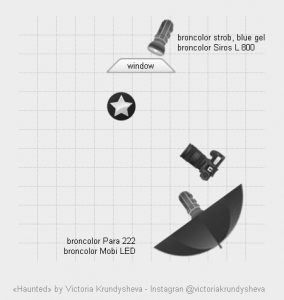
For the second set I used mobi LED with softbox under 40 degrees on the right and Siros L 800 strob and red gel to fill the space with red light and make it harder on model’s face.
This shot was taken from the back of my model to capture her reflection and most of the traces are from her dress flying around in front of the camera.
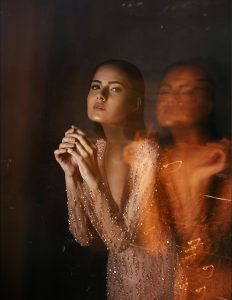
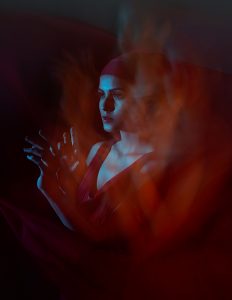
For the third set up I used 2 light sources – move L with softbox as key light and strob with blue gel to give it more drama on the left of my model. I alternated it with keeping both or one light on and eventually decided to work with one light to fit the mood.
We used a fan and two assistants to make the dress fly and create an effect of her being in the center of a flower.
For wider shots I worked with Parabolic Umbrella and added one strob with blue gel on the background to give it blue shade.
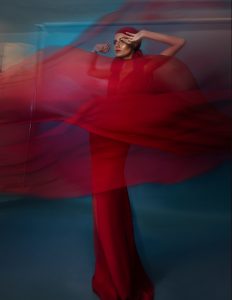
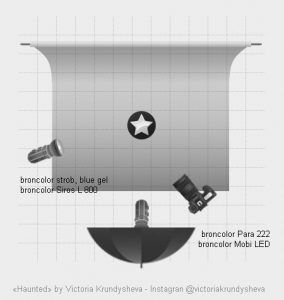
Para gives more lights as well as bigger coverage, so I adjusted my camera settings accordingly.
For last set I placed one strob light behind the paper window set. It created the effect of light coming through the window. In this set I made my model move as well, so overall effect created looks like she is fading into the background.
This technique is a lot of fun and a good way to experiment with light, pattern and motion. I would strongly suggest to try it out and have an open mind to get the result you will feel fits your style and vision.
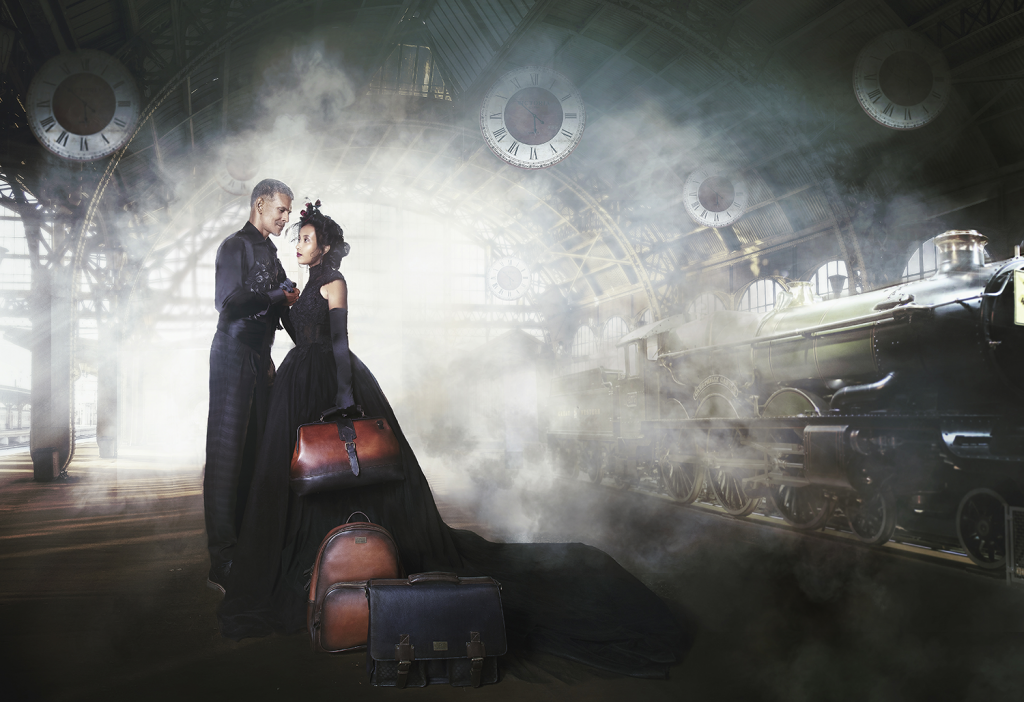
Editorial ” Haunted ” is published in Vulkan magazine October issue.
 Previous post
Behind the scenes with Milind Soman
Previous post
Behind the scenes with Milind Soman